January Slowjo Sewing

January has been a slow rather mojo-less sewing month this year.  I had all these grand plans, and have felt zero compulsion to sew anything.  So I’ve been fixing, mending and twiddling on a few things.

First, I tweaked the bodice of DD2’s Christmas dress (Burda 12/2012 #110).  Originally it looked like this, with ponte and lace all eased into a higher-than-designed neckline.  It didn’t work, and there was an absurd amount of ease to sew into the neckline. And, because it still wasn’t decent enough, I added a triangular lace insert at the CF.  I was not happy with it – it looked so less-than-custom-made, but it had to do for Christmas.

DSC_0096

Now, after lowering the CF on the ponte under layer (the bodice is unlined) as far as it would go – and as designed, I might add – and removing the CF lace insert, it looks like this.

bodice

Not a big difference, but the fit along the neckline is much better.  I’m still getting my head wrapped around fitting DD2 and what looks good on her.  Most of my sewing queue over then next couple of months will be for her, so hopefully I will learn a lot!

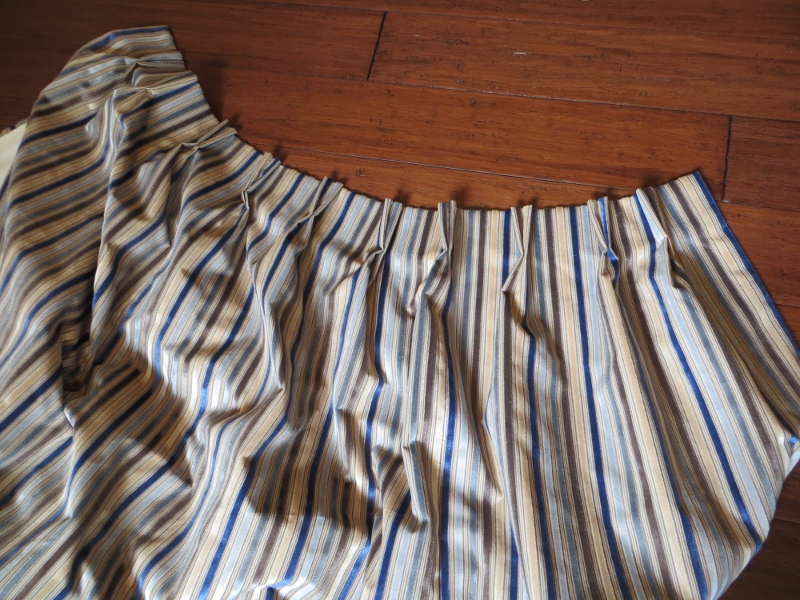
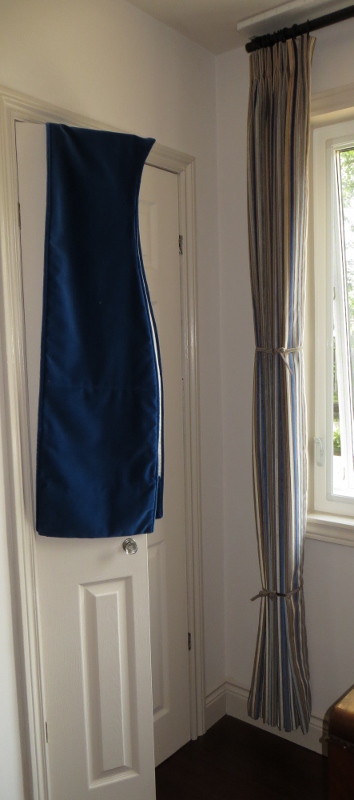
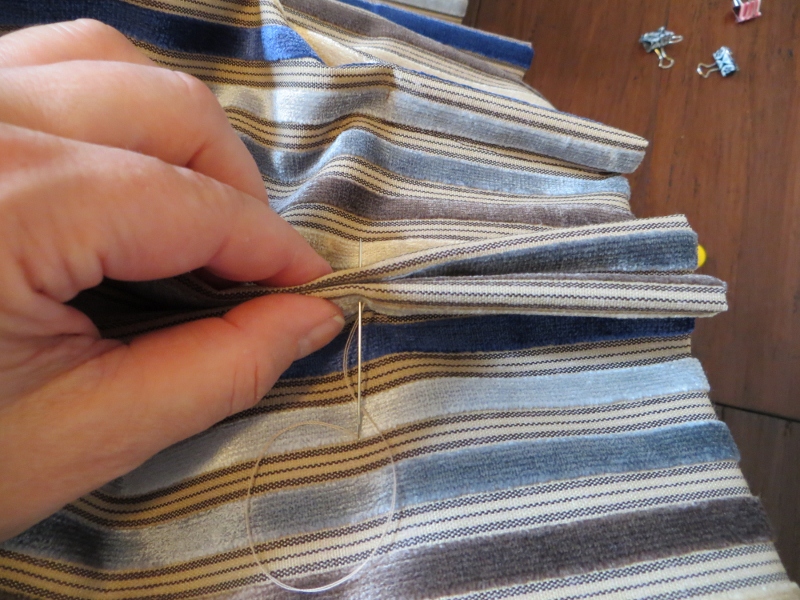
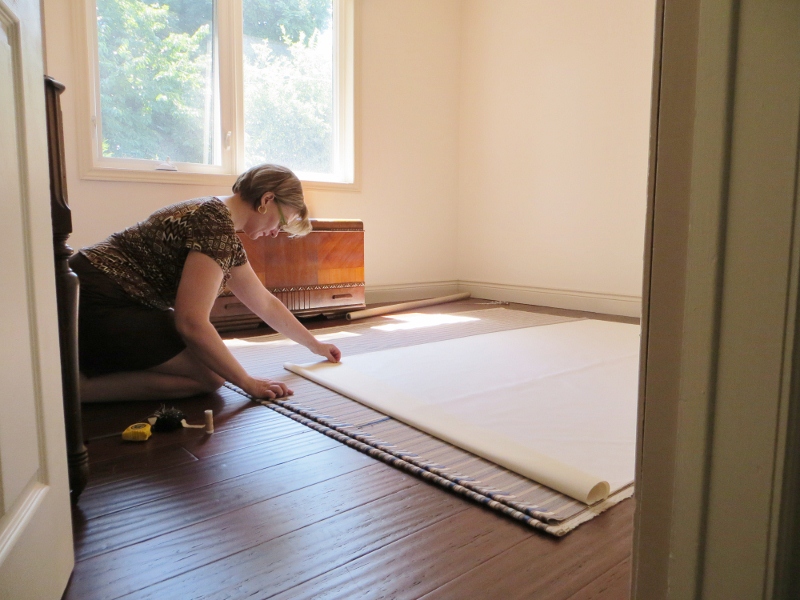
Then I agreed (with dread in my heart) to redo window valances.  I always hate being asked to do things out of my comfort zone, because I hate feeling like I don’t know what I’m doing.  I have no pictures of the project, but let me just say that it was an interesting ride.  In early December, I met with the client and the interior designer, and confessed that home dec sewing is not in my field of expertise.  So the designer measured all the windows, wrote them down for me, and off I went with the valances, her measurements and extra fabric from the client’s storage room.  After pulling one of the valances apart, I understood the method of construction, and started in on the project.  Everything was neat and tidy and I was pleased with my amateur work.  Up went the valances, and the client called me after Christmas to tell me that they were too short for two of her windows.  My bad.  I didn’t check the math of my measurements with a calculator.  And, to top it all off, the designer’s depth measurements were off by 2.5cm, so everything had to be taken apart and re-done so the corner box pleats actually hung at the corners.

And I’ve been BUGGED – BUGGED, I tell you – by the little details of the project.  The valances had a centre box pleat, which should have hung in the visual centre of the windows i.e. in the centre of the centre sliding frames.  But visual centre did not equal mathematical centre, so the centre pleats hang about 4cm off visual centre.  Do you follow me here?  And, of course, the designer wanted the centre pleat to hang in the visual centre, not the actual centre. Ugh.

And that bugs me.  BUGS ME!!  Part of me wants to go back and re-do those damn valances a third time, just so they can all be truly custom-made for those damn windows.

BUT…. and this is a big ‘but’…. I stopped to study a valance in my bedroom which was made a couple of years ago by one of the best drapery guys in the city.  He had worked solely off the window measurements the designer had given him, and after carefully looking at all the proportions, I realized that the mathematical centre of that valance was definitely not the visual centre in relation to my bedroom window.

And he is a paid drapery expert.  So I’m not kicking myself anymore.  C’est la vie, and all that.  But I did learn a lesson for the next time someone wants valances made by little ol’ moi.  Experience, experience!  Best teacher ever.

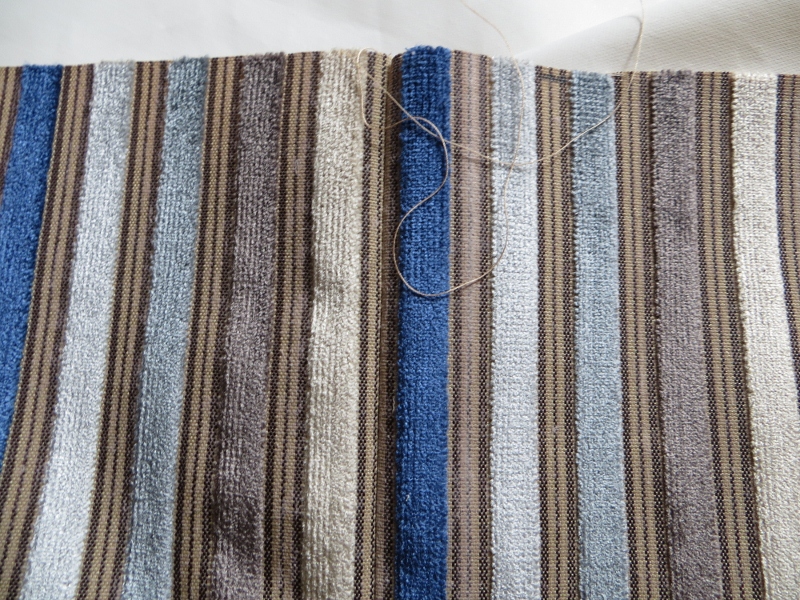
The next project was to give myself a new ironing board cover.

new board cover

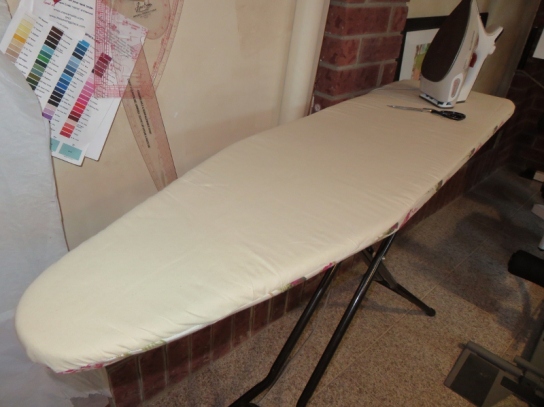
I have no pictures of the old one, but I will tell you that the foam padding had melded to the cotton cover through overuse.  I made mine from washed muslin and the leftover cotton batting (from my first attempt to make interlined Roman blinds).  It looks clean and the thick new padding is wonderful.  I should have done this months ago.

Then I put the waistband ties onto a pair of hip-hop trousers for DD1.  I made these last spring, I think, and she grabbed them before I could finish them, and has been wearing them ever since.  Yesterday she was walking around the house in them like she’d had some sort of horrible injury in the pelvic region, and I asked her why she was walking so oddly.  She said she had to walk like a weirdo so the pants wouldn’t fall down.  *headshake* The ties have been hanging on a project board since the trousers were made, so today they finally ended up on my sewing table to be properly finished.

And now I’m working through three projects that were cut late summer:

a safari skirt (Burda 04/2010 #140)140_skirt_large

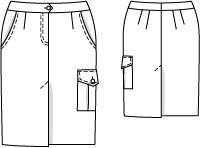
a silk scarf panel top (Burda 07/2012 #118), albeit with different fabrichttps://i0.wp.com/sewingprincess.com/sewingprincess/wp-content/uploads/2012/09/top.jpgand multiple-gored skirt for DD1 (Burda 06/2013 #132).132_0613_b_large
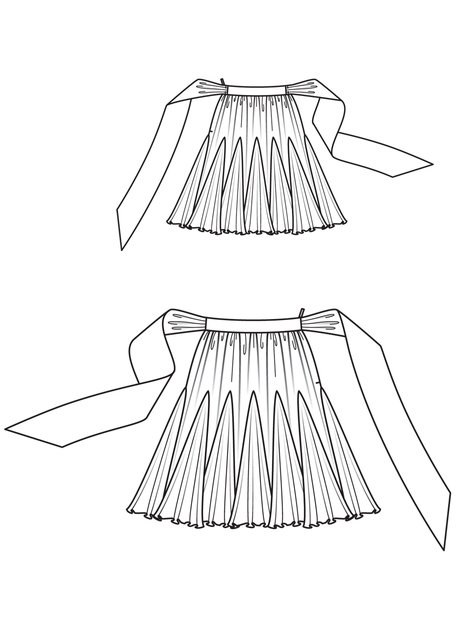
And I had hoped to get myself moving on Jungle January and Chris’s #JeansinJanuary, but I lacked both the conviction and motivation to start in on anything.  So I’ve missed both, but I am determined to finish all my UFOs before I begin something new.


bespoke drapes: finished project

bespoke bedroom drapesWell, what do you think?  I was so dreading this project because of the sheer size of it and the amount of fabric and the stripes!  I have no idea how to make drapes!  But they turned out reasonably well, if I may say so myself.  I’m pleased with how they look, and I must confess that I really enjoyed putting these together.  All the hand sewing that went into this project was calming, and I looked forward to the times where I could just sit on the floor with the panels spread out over my lap and sew each step.  I so loved the hand sewing.  And why did I choose to sew these by hand instead of by machine?

Well, because I trust my pinning and hand sewing results more than I do fighting with 13 yards of heavy upholstery-weight fabric through a machine that wasn’t really made for industrial type sewing.  I can pin and hand stitch a long hem with the confidence that it will be perfectly straight.  I wasn’t convinced it would be successful with my Babylock Crafter’s Choice machine.  And I didn’t want to rip out and re-sew mistakes.

And I could sew invisibly along the hemline and heading without fighting with an automated blind stitch.  This project was a good reminder of what I like about sewing, and why I like it:  hand sewing is precise, clean, calming and, for me, a great stress relief.  I guess that’s why I used to spend so many hours smocking when my girls were little.  That quiet time sitting down with needle, thread and fabric was a haven at the end of such busy days.

I confess my main reason for making these myself was the savings on the labour costs, similar to why I made my own interlined roman blinds a while ago.  After these projects, I’ll not complain when I get crazy quotes, as I have a first-hand understanding of what exactly goes into making custom window coverings.

Well, for now, I guess it’s back to garment sewing for a while.  There’s no other home dec projects in my future.  Well, actually, there is one that’s percolating on the back burner in my mind.  Initially, the living room drapes were to be of this gorgeous linen/silk/cotton fabric (called “Epoque”) from French decor company Nobilis.  Unfortunately, the only importer in Canada doesn’t carry it anymore.  And therein lies the problem.  I can’t get it anymore if I don’t order 120 yards because it’s out of production.  Um.  Well, as gorgeous as it is, I will never need 120 yards of this fabric.  I wish I did, but I don’t.NOBILIS Fabric,EPOQUE,8989-94I have tried to source something similar, but cannot find anything in this particular sage green-orchid combination.  I’m thinking of trying to replicate it via hand printing on a similar plain background.

bespoke drapes: dressing the drapes

haute decorWell, here is one full panel of my pinch pleat bespoke drapes.  Now they need to be hung and “dressed”, which translates into this:dressingThe panels get hung and shaped into the pleats in which they will hang, tied loosely together, and then they cure, much like we cure bias before sewing it up. I’ve read varying pieces of advice. Some books say 72 hours, others say 48. I’ll be curing mine during the day, since I really want to move out of my living room and back into the bedroom. dressing drapesThat’s the valance hanging on the closet door.  I had originally hoped there would be enough fabric to make the drapes ceiling to floor length, but, as you can see, there wasn’t.  So the valance and curtain rod will be hung about 4 inches lower tomorrow.

bespoke drapes: pleat details

hand sewn pinch pleatsOnce the pleats were marked and stitched by machine into place, I pinched them into two pleats and tacked them at the bottom of the heading.pinch pleats insideThis is the inside of the heading.  Once the lining was stitched to the bottoms and sides of the panels, the heading is folded over and catch stitched or herringboned into place.  I didn’t use any buckram or other stiffening in the heading because this fabric has a coating of some sort that makes it extraordinarily stiff.

I enjoyed all this hand stitching.  It was so relaxing sitting in my room, listening to music, hand sewing yards and yards of fabric.  Some of you love to knit.  I like to stitch.

bespoke drapes: attaching the lining

joinsThe lining was measured, cut and joined to match the drapery fabric.  Now I’m using long basting stitches to attach the lining to drape itself.

The next leg of the project is attaching the lining to the drapery along the hemline, return (sides) and overlap (centre front) of each drape.hemlineThe lining has been cut to match the hemmed drape, and the bottom turned up twice and machine stitched.  Now the lining will be slip stitched along each side and the bottom hem.

bespoke drapes: hemming

drapery hemThis is all I’ve done today, what with summer activities and the time involved for this project. I’m using a catch stitch – or, in drapery language, a herringbone stitch – for the hems. And I’m very thankful for my leather thimble, without which my finger would be shredded.

bespoke drapes: cutting

working on drapes We are slowly renovating our entire little bungalow. My goal is to have a 1950’s bungalow-sized Fabergé egg house, only it won’t be so spectacular on the exterior.  I want a bejewelled interior that I will love to inhabit for the long haul.  To that end we’ve redone our kitchen, the girls’ bedrooms and have just laid the new floor and re-painted in mine.  The living room is coming together piece by piece…

But right now I need to make my drapes. I didn’t have enough faith in my sewing skills to do a shaped valance, so I paid a professional to do that. (Hey, it was velvet and I really don’t know what I’m doing with drapery, OK?)

I’ve had this fabric in my stash, awaiting this day for almost two years. Today I finally hauled it out and laid it out and measured, cut and joined it.joined lengths of fabricAnd because I’m new to this and don’t want to make a mistake that can’t be undone, I’m taking my time.  A lot of time.  Like 4 hours of time just to get the cutting and joining right.  Tomorrow I’ll start hemming the bottoms and the sides.

bed crowns and curtains

Well, the curtains are finished.   Actually, they’ve been sitting on one of the sewing tables waiting for the crowns to be adjusted. bed cornice My camera does weird things with perspective. Anyways, the problem is a long story. You see, this is not what I usually sew, and I don’t always measure or understand the math involved in proper pattern making as some of you well know. This flaw spilled into this project. The curtain headings are 4 inches deep, which is the depth of the crown. The original eye screws were put into moulding at 1/2 inch intervals, 1/2 inch up from the bottom of the crown. But my drapery hooks are 1 inch long, so you smart readers will know that the bottom 1/2 inch of the hooks will be peeking out below the moulding. But I had to sew them up and hang them before I realized this. I solicited DH’s help, and he glued 2-inch blocks of wood inside the crown and has re-screwed the eyes up higher.crown moulding So now, all is good in the bed curtain world, and we have this:

bed curtainDD1 slept, for the first time, in her be-curtained bed and informed me this morning that she likes the curtains because they can be adjusted for privacy and light control.   I’m glad they’re a success.

And my dear eldest painted this lovely scene from Barbie and the Island Princess for the bedroom door plaque.  She’ll be stringing DD2 and 3’s names painted in flourishes underneath for the finishing touches.door plaqueIn my last post I commented that I was pencil pleating these curtains by hand.  I suppose I could have used the readily available pleating tape, but I wanted perfect control of the pleats, and I didn’t trust the tape.  Besides, I find sewing by hand extremely relaxing.

Well, this home decor project is finished, and if you thought doing pencil pleats by hand was more work than a home decor project is worth, you’ll think I’ve really gone off the deep end for the next project.  😀

hand sewn pencil pleats

bed canopy curtainsI’m making bed canopy curtains for DD2 and DD3’s bedroom.  I’m bereft of any ability to decorate space, so I hired a designer, and two years later, we’re finally putting the room together.  It’s “Barbie and the Island Princess” themed in a non-Barbie way.  So for now, I’m doing pencil pleats.

By hand.pencil pleat by hand

Roman Blinds

I’ve been sewing up roman blinds for my kitchen for the last week or so.  Fully interlined and lined roman blinds are not exactly what I would call simple to make.  green blindI have two windows in my kitchen, one is small (36″x34″) and the one pictured above is large (54″x61″).  The large one faces almost due West, and in the summer it is extremely hot on that side of the house, as you can imagine.  We can literally cook eggs on the metal frame outside the window.  So I wanted interlined blinds to help keep the heat at bay.

I have a couple of great books for sewing home decor that I referred to, but I really wanted a step-by-step tutorial, and found this little beauty at Sew-Helpful.com which laid everything out, including a fabric calculator to the nearest half-centimetre.  This was the first time making fully interlined roman blinds, and with the help of a friend and constant references to the online tute, I made these up.

small blind (800x600)I’ll confess that the small one was much easier to do than the large one, and yet I still had to re-do parts of it because I’m not a home dec expert.  The quote I was given to have these blinds sewn up professionally was $1500 + tax, which was a little out of our budget, to say the least.  After reading posts on Stitcher’s Guild and wandering down the linked rabbit trails, I discovered that custom roman blinds are high-priced because there is a lot of hand sewing involved.

Let me just tell you, that is 100% true, and I now understand completely why the quote was so expensive.  The only part of these blinds that are machine stitched are the channels for the 5mm rods and the velcro tape at the top edge.  E.v.e.r.y.t.h.i.n.g. else is hand stitched.

The bottom and side hem allowances are catchstitched to the interlining, as is the bottom hem.  The lining is fell-stitched to the blind; the little rings are hand tacked, and every 15 cm or so along each rod pocket are tiny stab stitches through all thicknesses to keep the layers from ballooning.blind reverse side (800x600)I would never in a million years have thought so much hand work goes into home dec sewing.  Or space requirements.  Yup.  I think this is probably the biggest reason that I would

One of the conundrums was the width of the large window, as I wasn’t sure the fabric was wide enough to do the blind without joining widths.  I bought enough fabric thinking I would have to join widths, but when the bolt arrived, I was pleasantly surprised to realize I could cheat a little on the sides’ turn allowance and not join widths.  I actually had enough left to have a cushion made up for the front entry way because of this little (2 cm wide) cheat on the sides.pendant and blind (800x600)I’ll admit to redoing a few turning allowances more than once on both blinds, and that the large one is not 100% custom-made perfect, but I’m pleased with them, and have a tremendous amount of respect for custom drapery costs.  I do have interlined drapes that need to be done (eventually) for my living room, and I’ll just say that I am going to be quite pleased to pay the cost for excellent custom work when the time comes.