I have a goal: to work through as much of Mezzo’s Fabric Store as possible, hopefully using most of the goods for other people, not myself. Here we have the first completed garment that meets the goal! Yay!
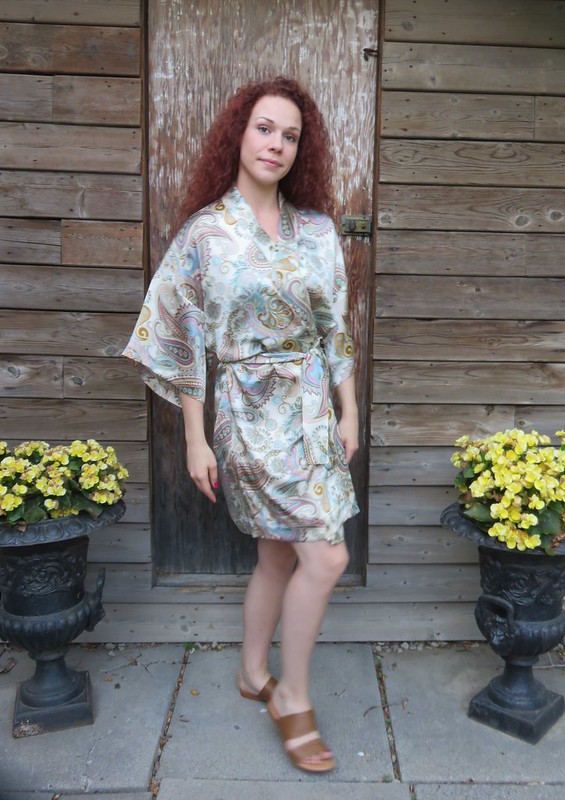
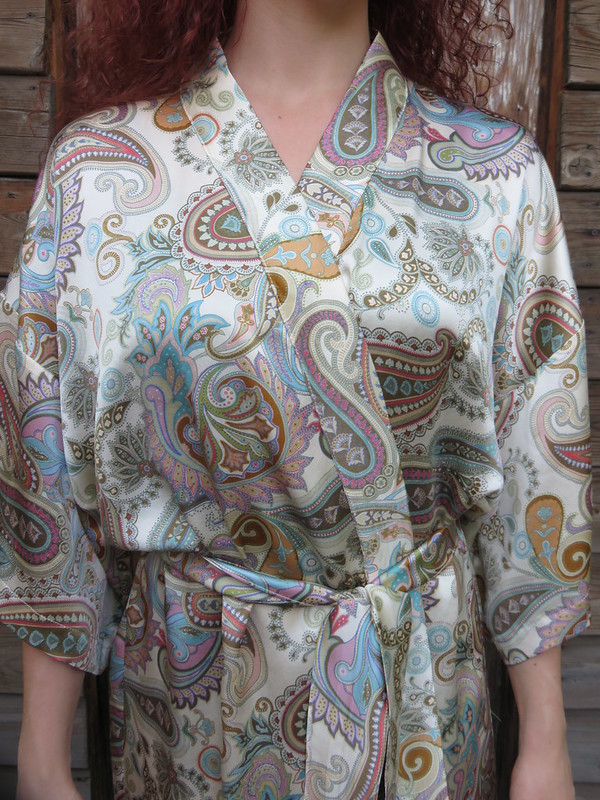
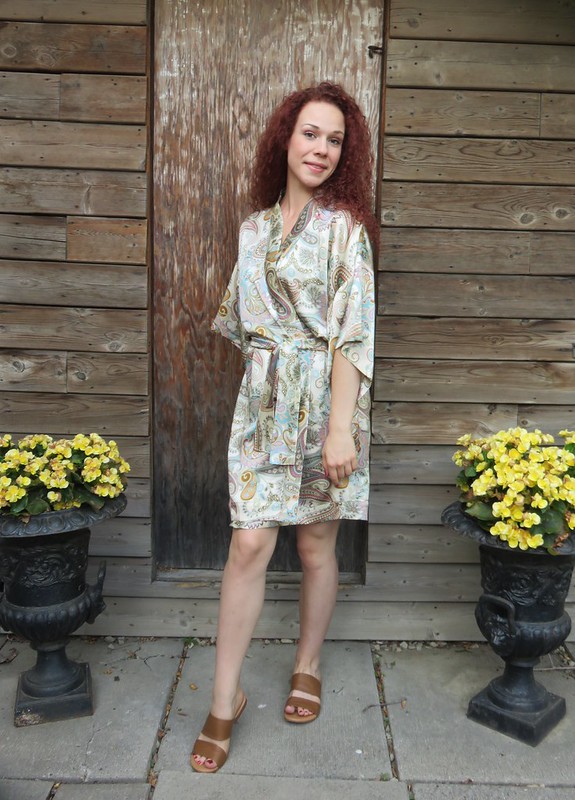
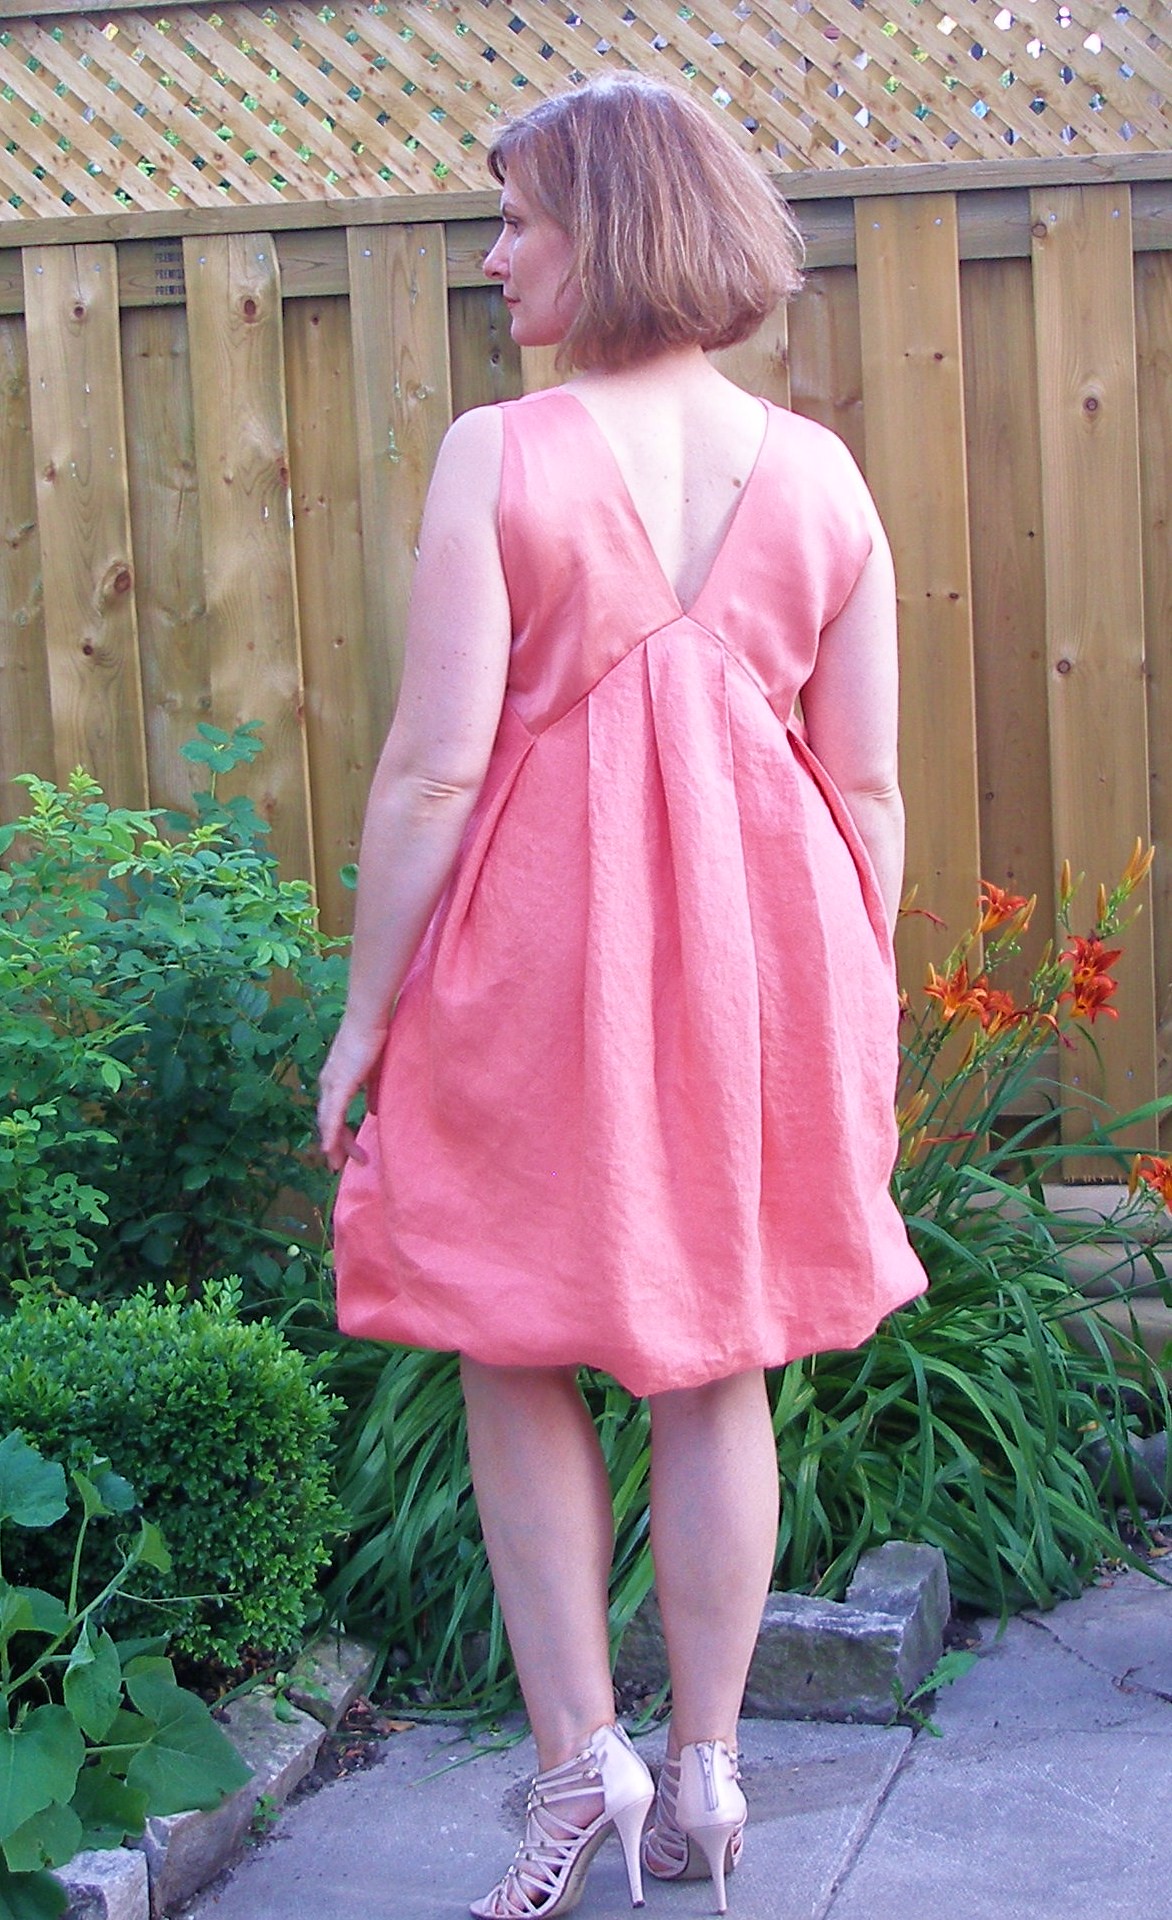
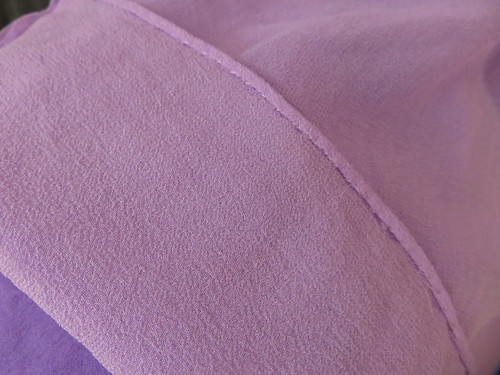
My DD3 and DD1 like to lounge about the house in shorts and tanks or crop tops, and, in my opinion, have been sorely in need of ‘grown up’ robes since outgrowing their fuzzy cute childhood versions. Enter the tote full of silks with the instructions to find one or more lengths to their liking, preferably for robes. DD3 chose this gorgeous silk charmeuse. Here’s a closer look.
I actually sewed this version for DD3 up prior to my linen version. I was so impressed with the fit and simplicity of the design and how little time it took to make (even in fussy, slippery silk charmeuse!) that I had to make one for myself. The pictures do not do this fabric justice. It is a stunning robe in person.
I have nothing interesting to say about this, except that Burda’s instructions do not include details like a hanging loop at the centre back or belt carriers at the side seams. There are pockets, but I didn’t have enough of this silk, and DD3 didn’t want them, anyway. I left them off my version, too.
Here’s to swanning around in silk kimonos instead of schlepping around in scruffy shorts and crop tops!
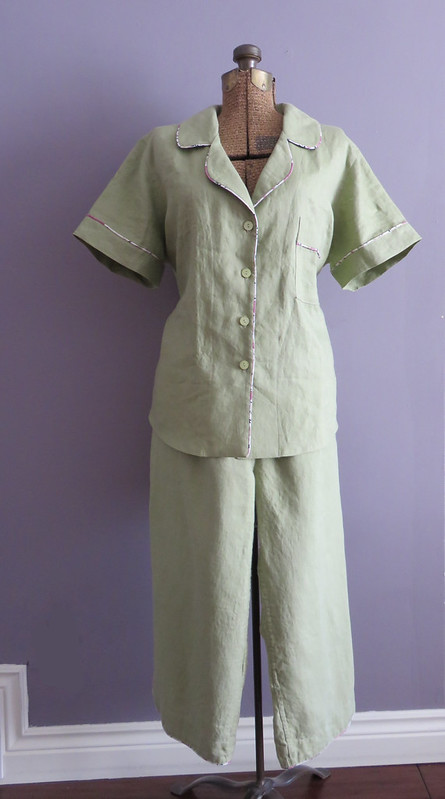
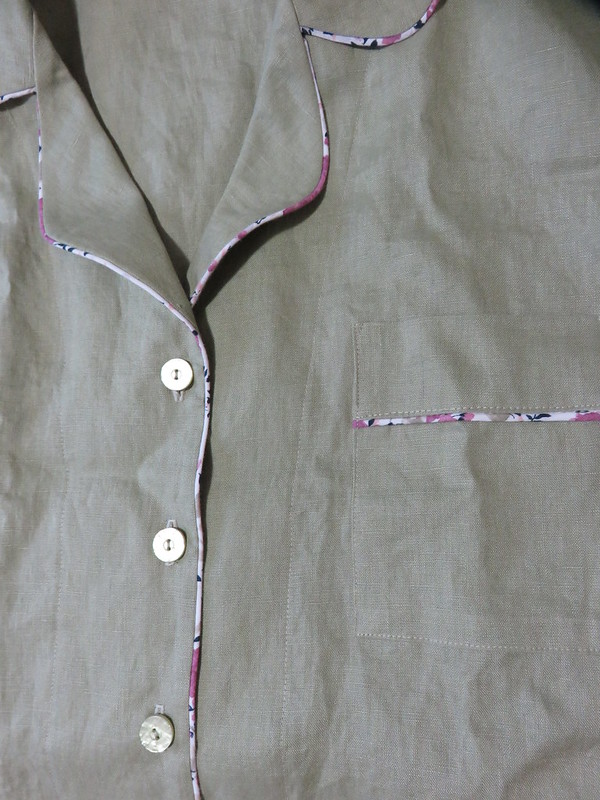
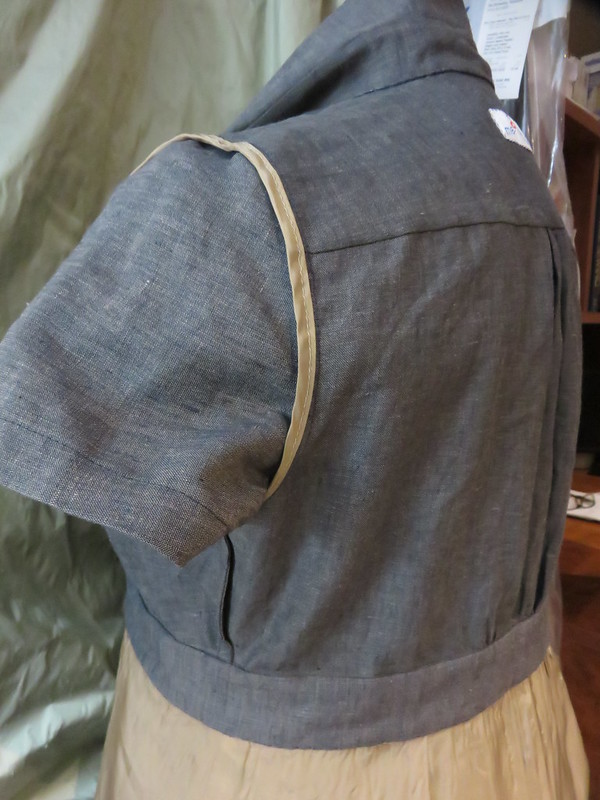
I have been in sore need of decent summer pajamas for a while now, and finally made some up from old stash linen, using cotton scraps from this old pair for piping and the shoulder straps on the tank top.
I used the Sewing-Universe-Famous Carolyn Pajama top, which I haven’t yet worn – it’s just too hot! But I see this getting a lot of wear in the spring and fall. The bottoms are Burda 12-2014-135, which I’ve made several times for myself and DD2.
I have a pair of Bedhead pajamas and like how the front facing is stitched down to keep it from flopping around. I did the same on this top, although the instructions did not include this step.
And to keep cool during the summer, I made a linen version of Burda 5-2013-101, which is also comes as a dress pattern.
image burdastyle.ru
As far as style goes, linen isn’t the best choice for this top: a drapey silk or viscose would be a better choice. But it’s cool and comfortable and plenty roomy for pajamas.
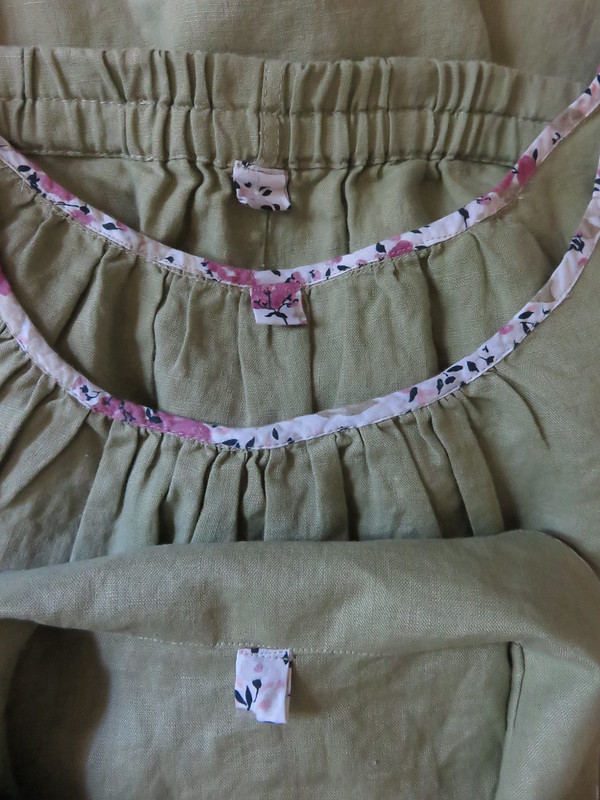
And, just for fun, I added little ‘tags’. Actually, they have a practical use in the tank and bottoms, as they indicate which side is the back!
And because I needed one, I made a quick kimono robe from some printed linen that I’ve had lying in stash for a few years. The pattern is Burda 2-2012-116. Honestly, trying to find pictures on Burdastyle.com is such a hassle. Whoever designed their new website should be fired, because it’s absolutely terrible. The Russian site is far superior, imho. You can search images and issues all the way back to 2004. They even have the year 1987 listed!
And here’s my version. I’m not modelling any of these, because, seriously! I am past putting pictures of me in my pj’s up for public consumption. Be thankful.
I must be an idiot, because I really hate the new WordPress block editor. I don’t want to add a block. I want to type and have the option of embedding photos without clicking on a plus sign.
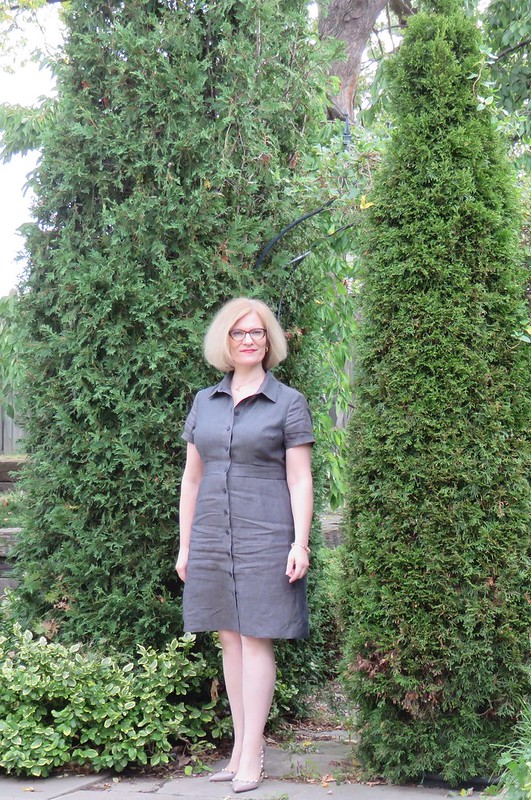
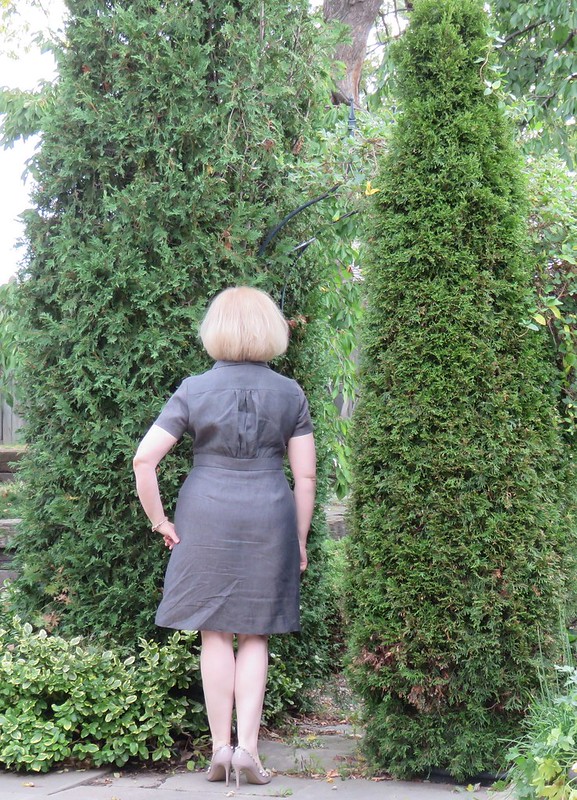
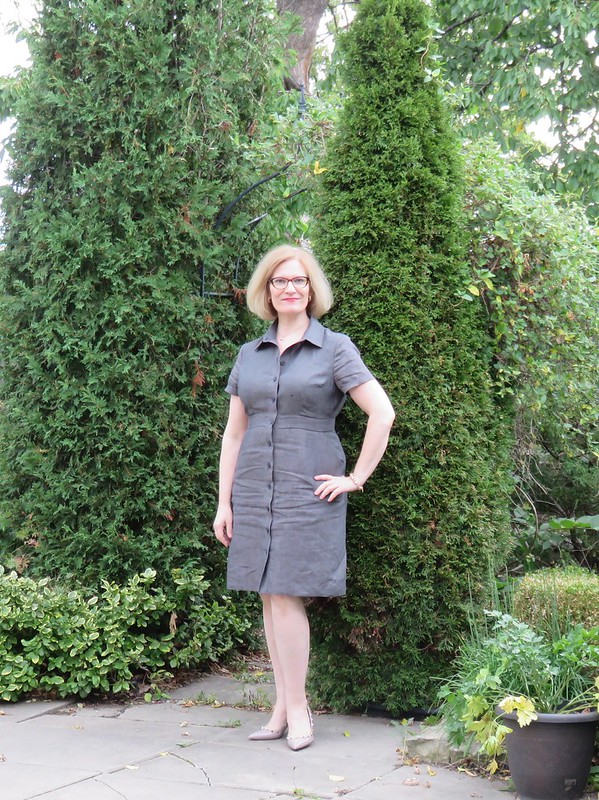
Ok. My frustrated little rant is done, and now on to the reason for this post: a shirt dress made last summer from a lovely cross-dye medium weight linen. I confess I have so many fabrics. My stash is an embarrassment of riches, and I really loved this linen when it arrived in the mail a couple of years ago. I originally had planned to make summer linen trousers with this, but I had two lengths, one of which wasn’t quite a metre, so trousers were out.
What to do with it?
I decided on the very popular shirt dress pattern from a few years ago: McCall 6696, dictated by the lengths of the two pieces of linen. It was my version of a muslin, although this is definitely not a muslin. I wasn’t sure I would look good in the style or be comfortable wearing it. It’s a little more ‘office attire’ than I had intended, but that is a result of the fabric. And, typical of how I work, when I make the dress again, I will change a few things: raise the armscye 5cm, and forgo the short waist adjustment. These will both be necessary in a sleeveless version, which I would like to make.
My favourite part of the pattern is the blousing in the back.
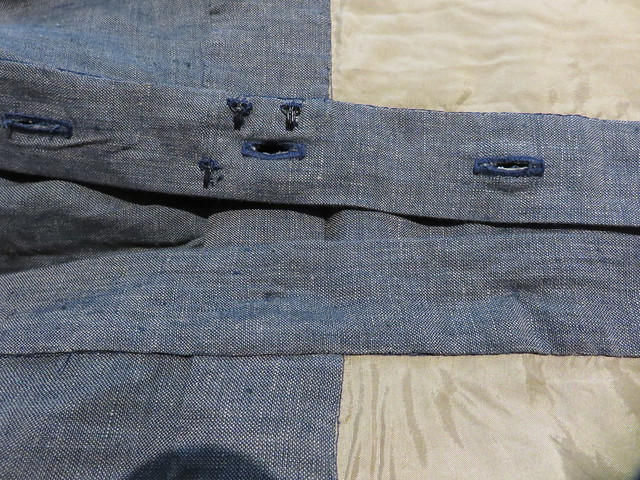
And I used up some bemberg from a previous project for lining the skirt and binding the armscyes. I always like a lined skirt, and it helps the linen to not be too wrinkled by the end of the day.
I added extra hooks and thread loops to where the waistband and the front band intersect to help it lie closed, instead of flipping (or straining) open.
I like to finish the interior of my garments as nicely as I possibly can because it makes me happy when I put them on, and when I wear them. And bemberg feels so amazing to wear. I know people prefer crepe de chine or, in the case of a linen garment, cotton voile or batiste, but there is nothing that feels cool and slippery in the heat, or keeps wool from sticking or itching in the winter, like bemberg, imho.
I’ve only had a chance to wear this dress once, but I am very impressed with the quality of this linen. The photos were taken after wearing for the day, and you can see for yourself how little the linen creased. Oh, and as for the rant about the WP blocks, a little reading soon made my life easier. Ha!
It’s been an entire four months since my last post. Who would have guessed the world would turn upside down since then? I haven’t been sewing very much. I haven’t had the strength or inclination. I haven’t even been thinking about sewing lately. And this is a problem, because I need to start sewing my stash. I asked DD1 and DD3 to pore over my box of silks, choose a few lengths for kimonos or robes (dressing gowns) and once they had, the fabric sat on my sewing table for weeks before I washed it (yes, they will wash the garments, so I pre-washed – and in two cases, dried – lengths of silk charmeuse for their robes).
I’ve set small goals for myself: trace or cut out a pattern one day. Make adjustments to it another day. Lay it out on the fabric and, if it’s a good day, cut it out. Sew a few seams another day. I have found that limiting my sewing time to around an hour is best, as I feel energized and happy with work well done. So that’s my modus operandi these days.
But in the meantime, I thought I’d share this quickly-made tee from Simplicity 4076. The fabric is a rayon jersey from EOS which was purchased a few years ago. There’s not much to say. The pattern is a quick make, and I made up my usual size without any alterations.
One little successful sew under my belt is the ticket to more stitching, I think.
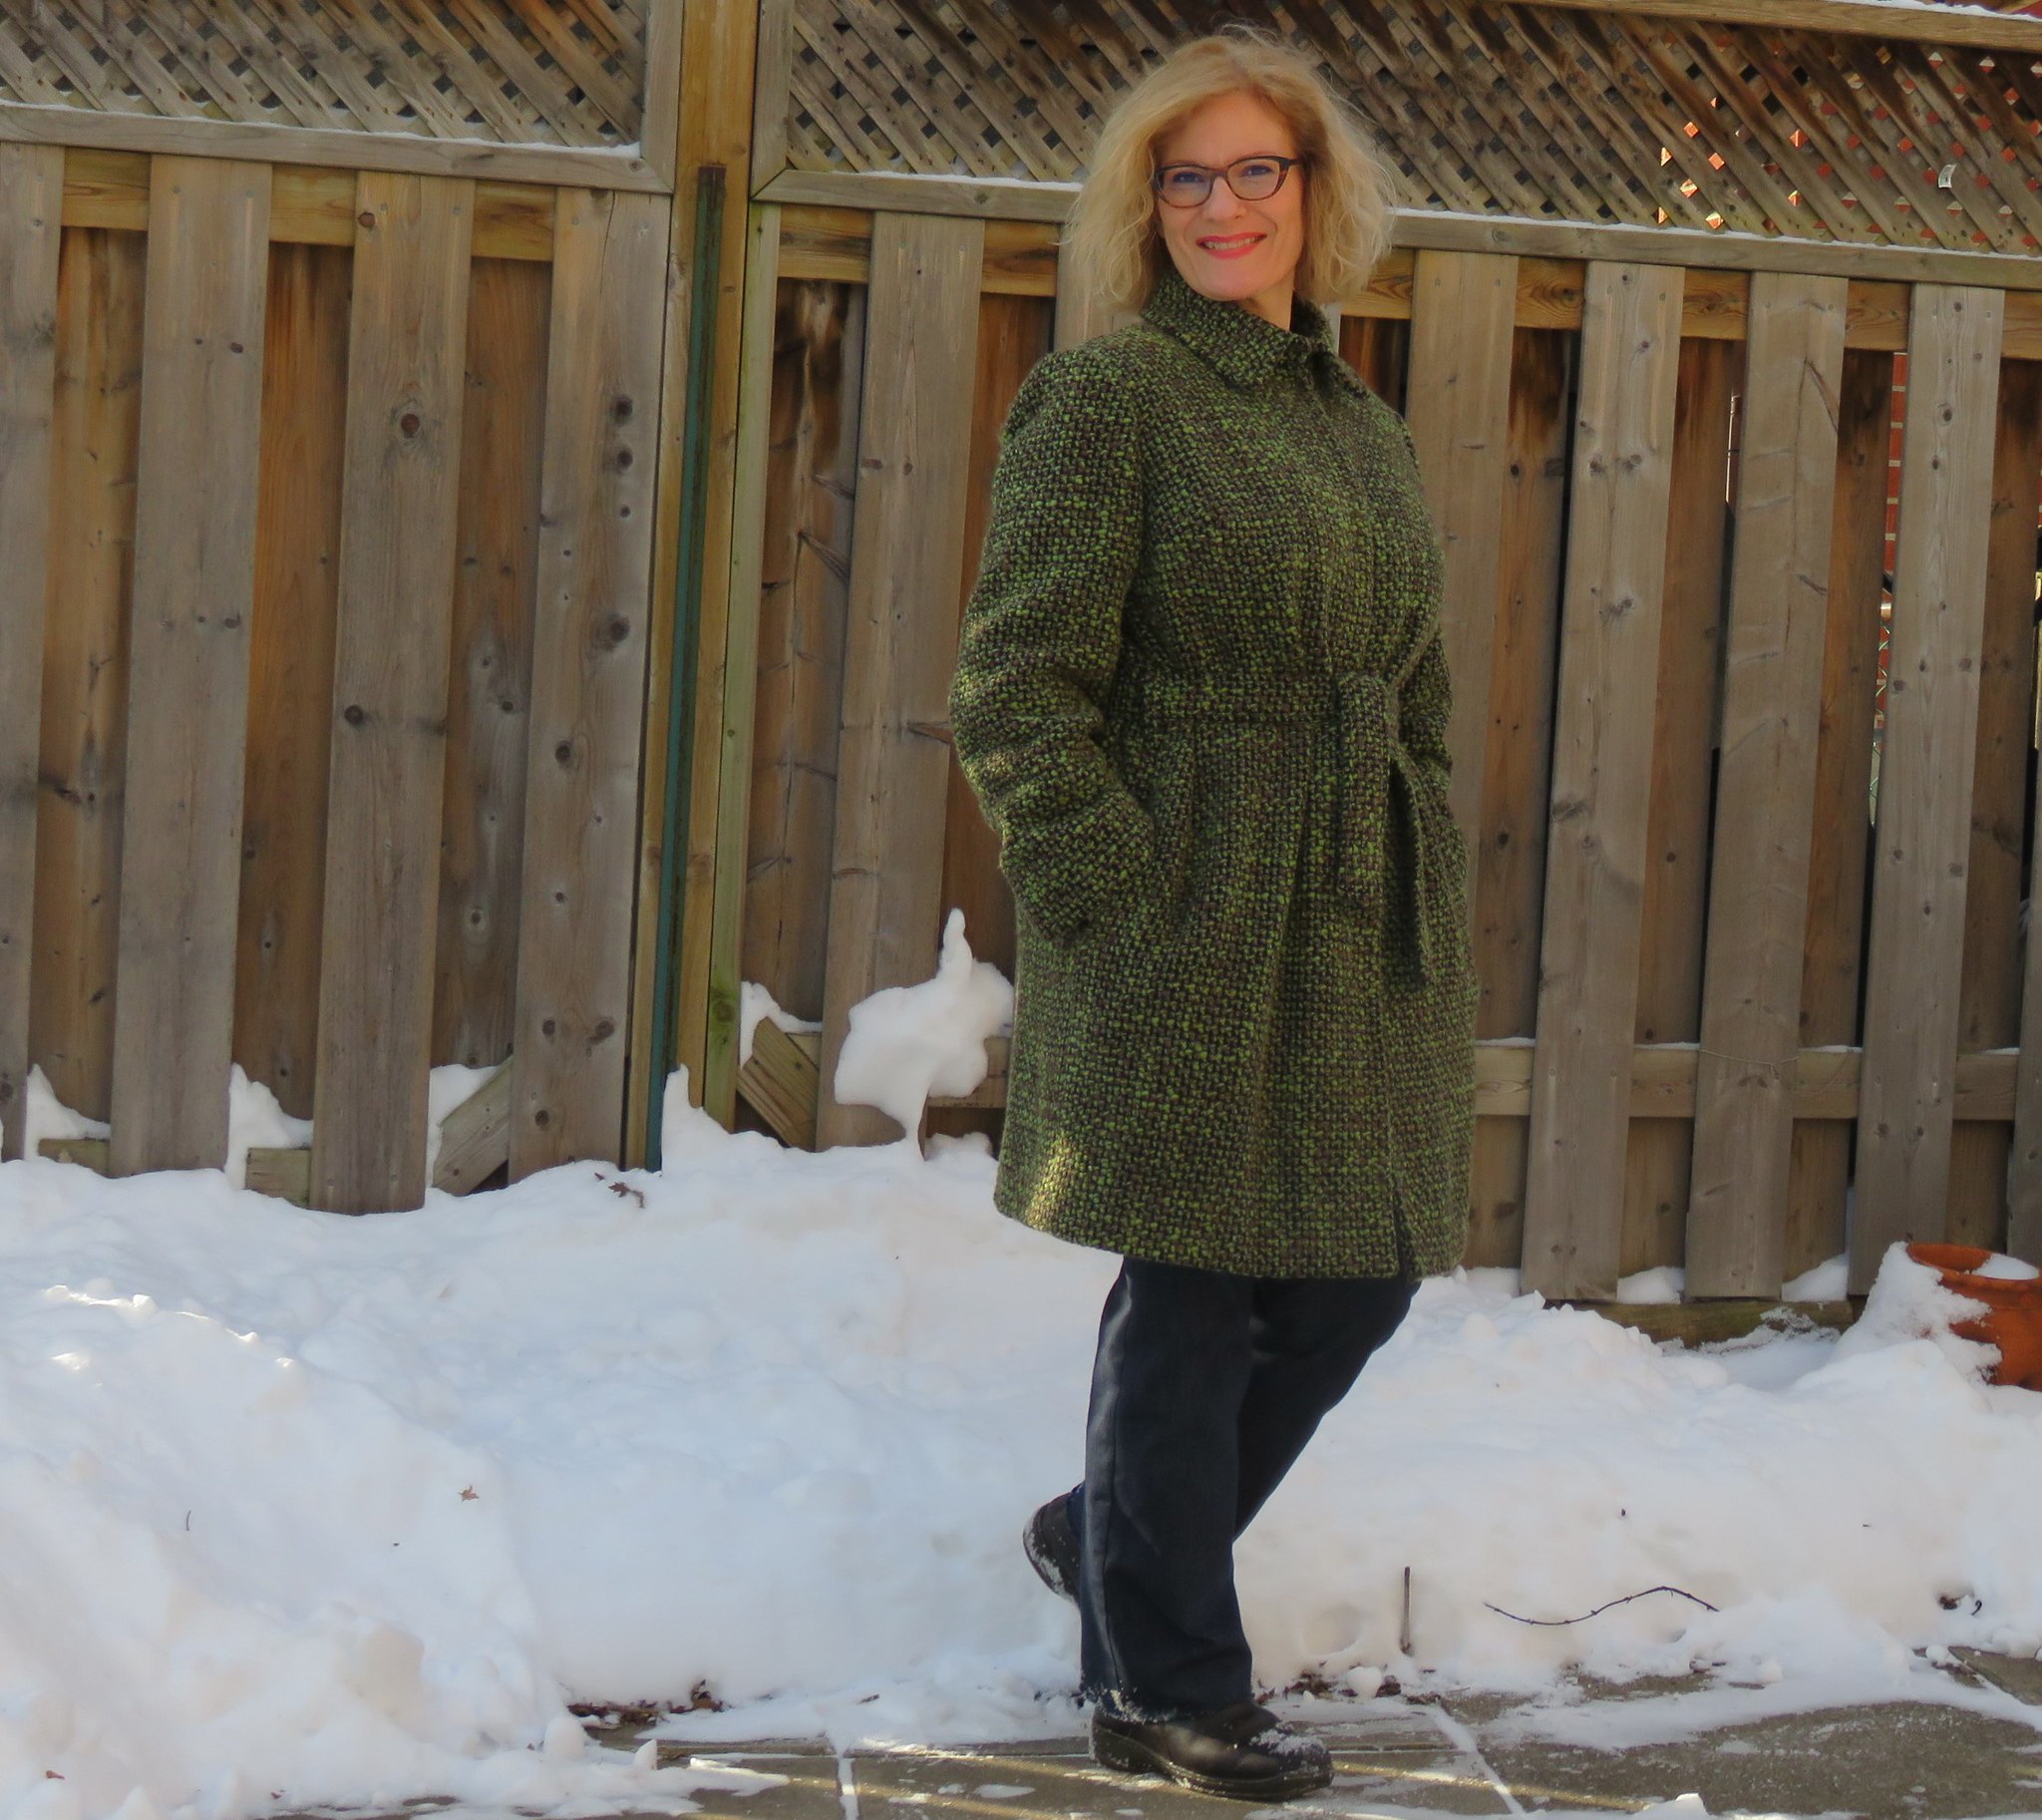
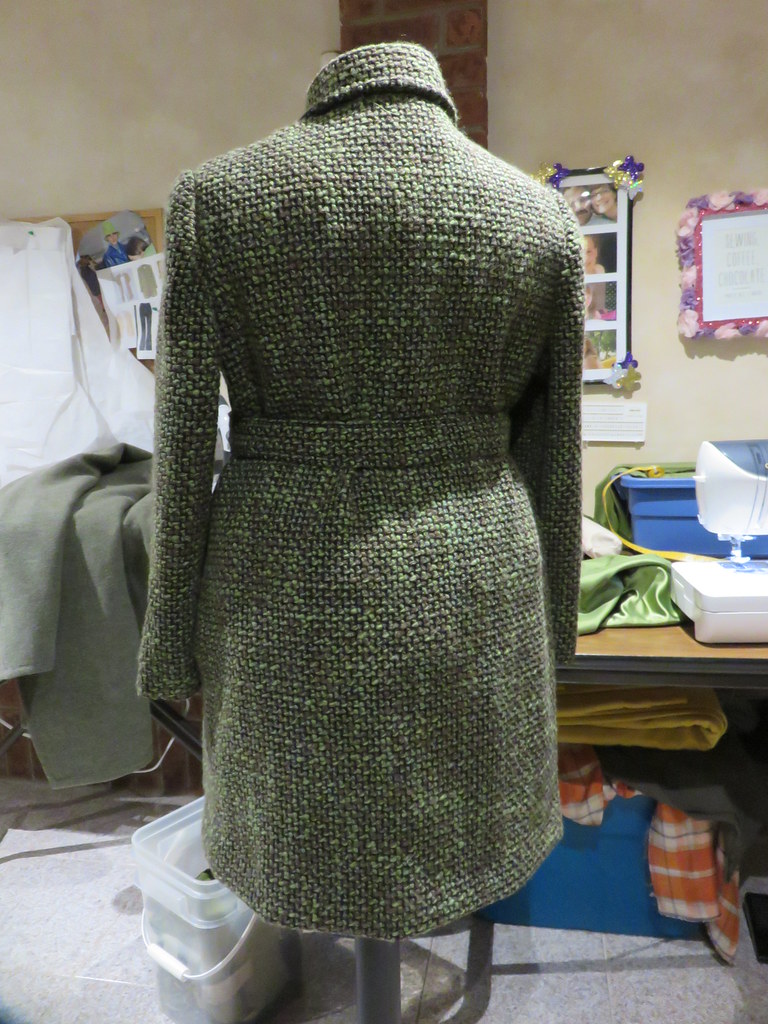
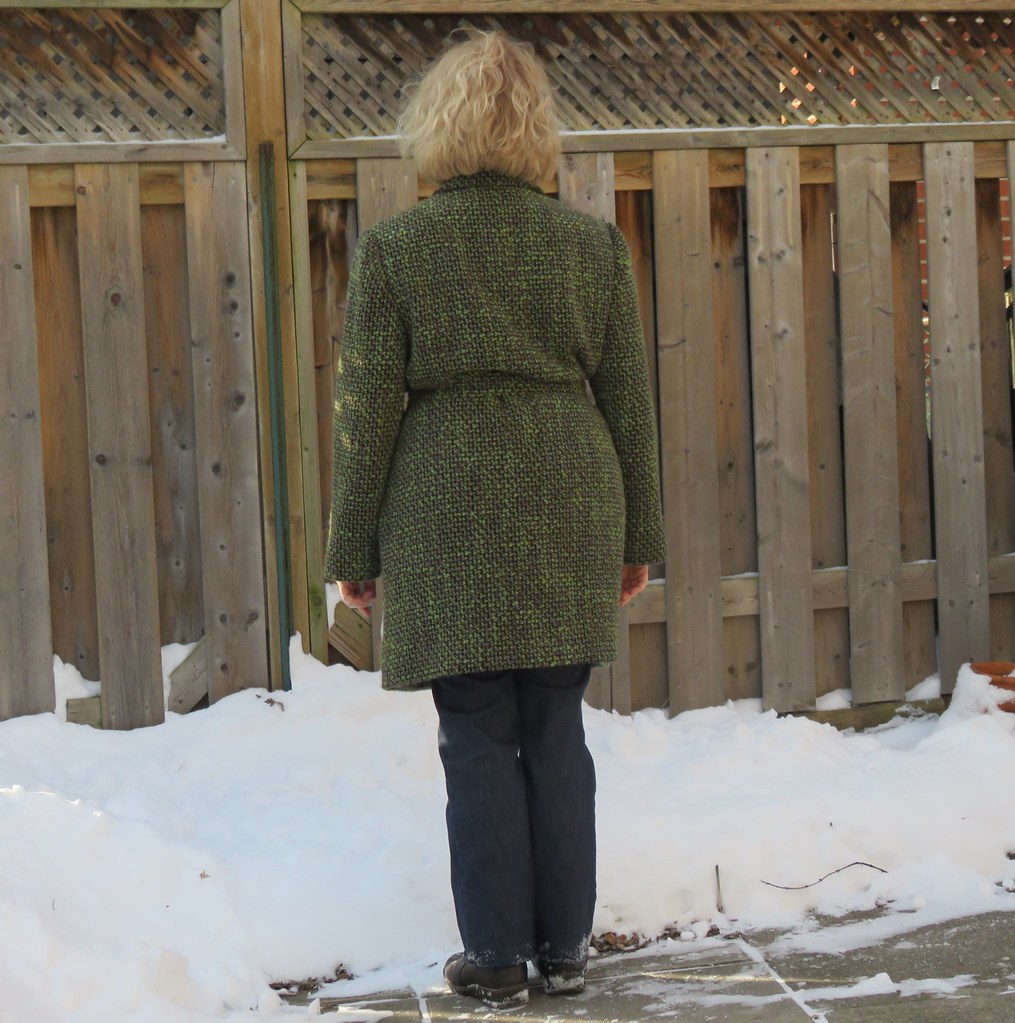
And it’s finished! I have a car coat that I am happy with, and that I have already worn more in the last week or so than I ever did in it’s first iteration.
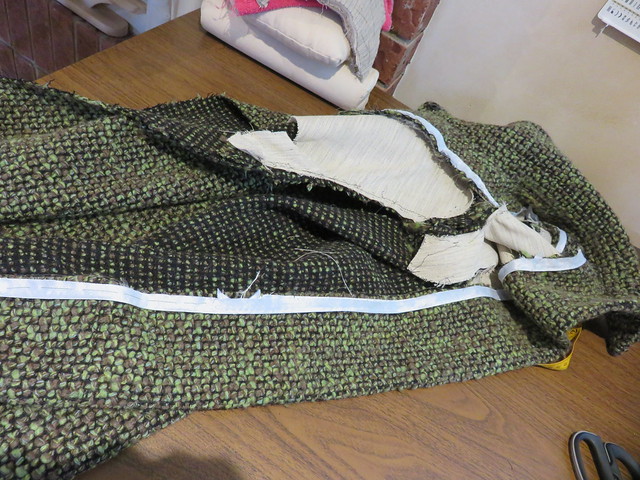
Compulsory inside view of the back with ease pleats. I am so much happier with this lining than the first make-do version!
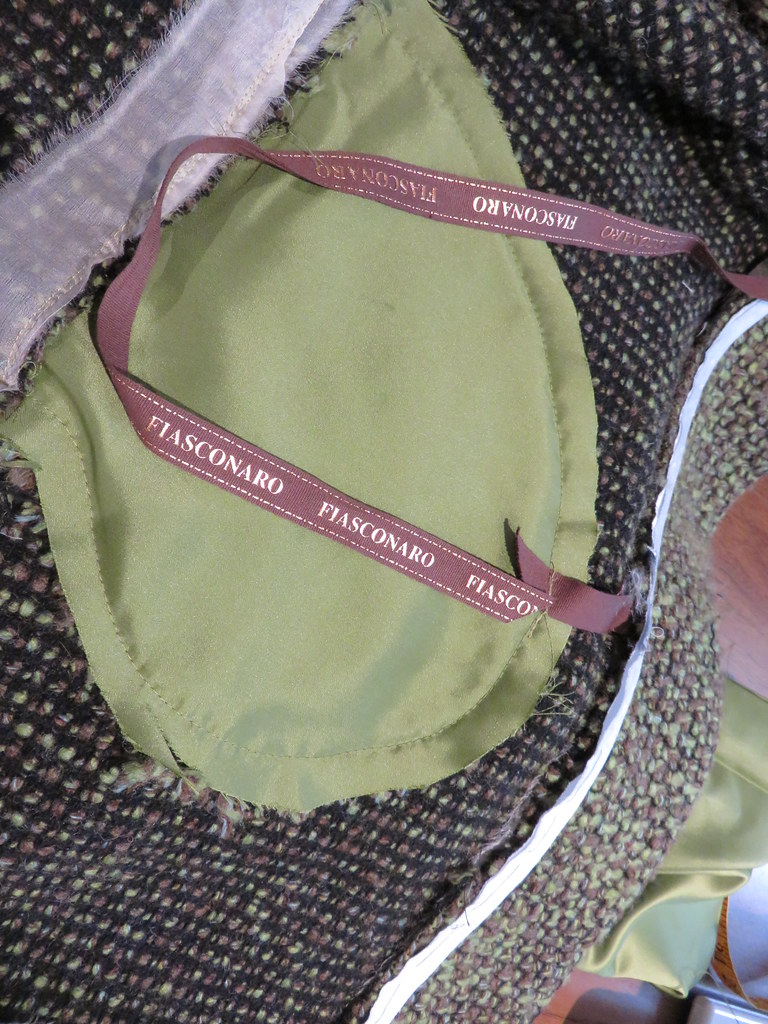
I kept the pretty blue silk piping on the inside. Here’s the inside view of the properly placed in-seam pockets, complete with pocket stay, attached to the front facing with ribbons saved from the Christmas Fiasconaro panettone. Do you do this? I keep all those decorative fabric ribbons that make boxes pretty: Maison Birks, Jo Malone, Fiasconaro, Pottery Barn, etc., etc. If anyone decides to dissect my jeans, they’ll be in for a surprise! They work surprisingly well when twill tape or some sort of tape is required in places.
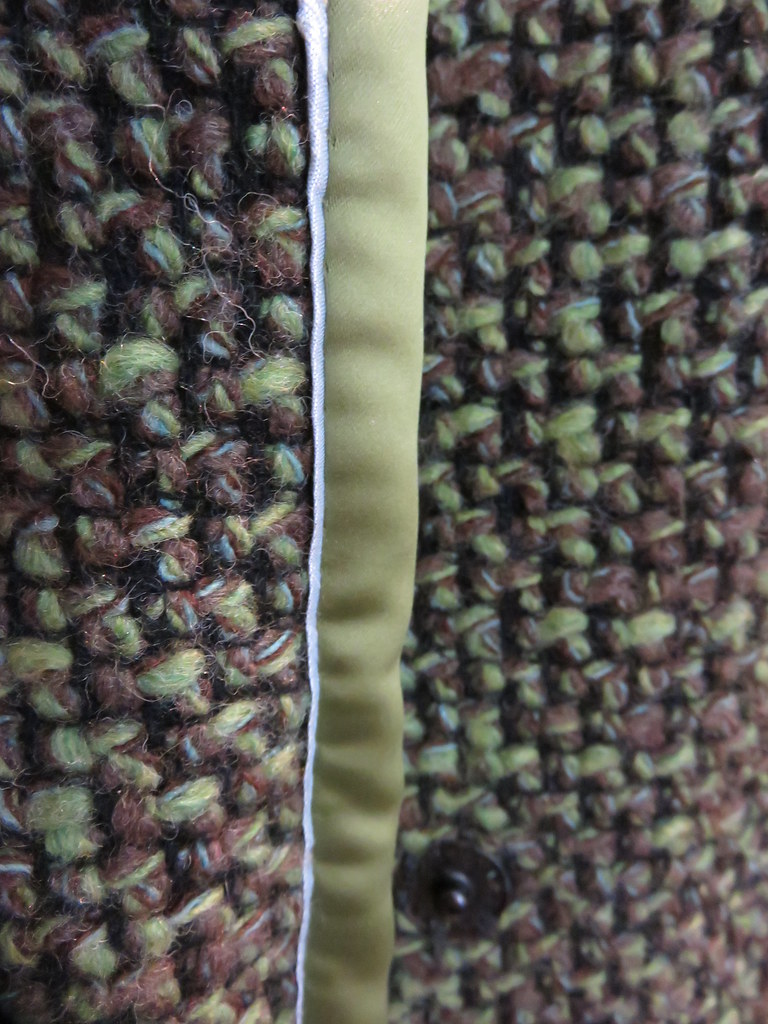
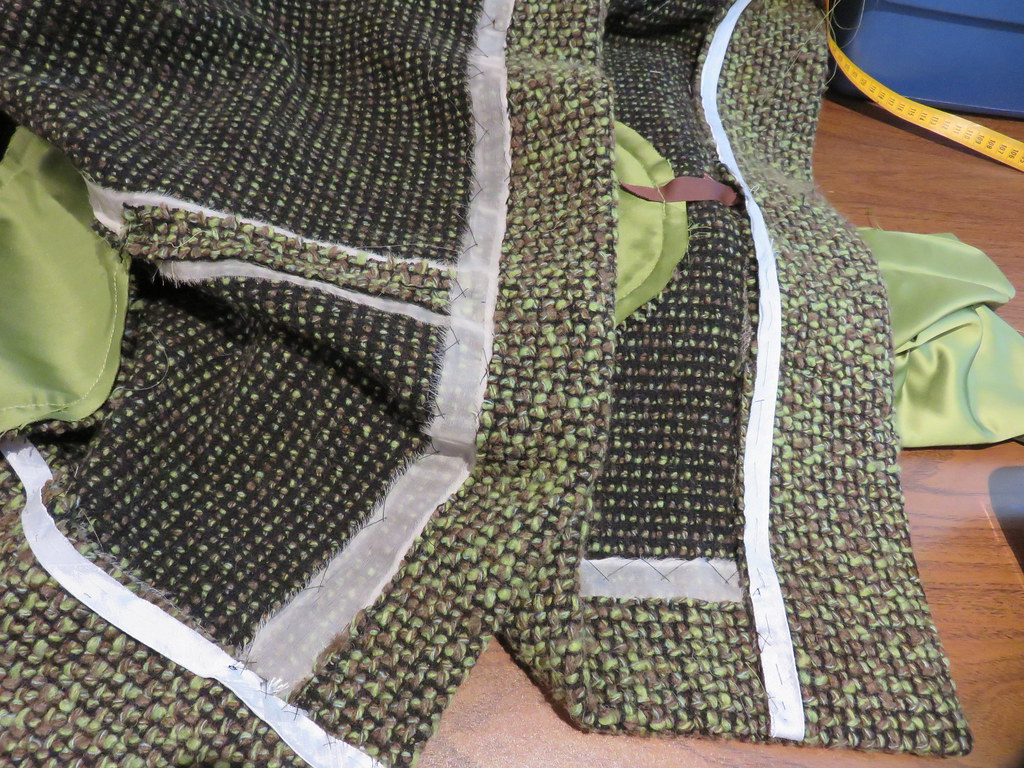
Here’s another picture of the inside. I didn’t underline this coat because the fabric is actually a sort of knit, and I wanted it to be ‘free’. I did reinforce the hems, seams and facings with a combination of silk organza strips (straight grain) and horsehair (straight for the front and bias for the sleeve cuffs). The grain across the high chest is now straight. The front is lapped, not snapped shut, so it looks off, but it isn’t. Back view on my double in the workroom. I’m happy with the grain and the slimmer fit. And then the back view on me. No glamourous fashion footwear here; just practical warm winter boots. And a side-ish view, both belted and unbelted. I usually wear it belted.
I changed the placement of the belt loops, too, because they were too high in the original coat. You can see closeup photos of the actual loop with it’s lining back (less bulk) and it on the coat with the belt drawn through it here.
I am so very happy with this coat now! The fabric is from EOS, and it’s cozy and so pretty up close.
Woo hoo! First major project of 2020 is in the closet. Now I’ve just to finish altering DD3’s jumpsuit and get some photos of it so I can show you here make from a couple of years ago. Alterations are necessary due to height changes and the general slimming down that happens in mid-teen years. After that, all my alterations are done and I can start on new things!
My first project of 2020 is to remake the last winter coat I made back in 2018. I intend to shorten it to car coat length so that I will actually wear it, as it has only been worn twice since it was finished. There are several things that just bug me about the coat:
It is a BIG COAT, which is what I was going for in the first place, but I really hated my slap-dash-use-whatever-I-have-lying-around-the-house-that’s-the-right-tone lining (drapery silk shantung that had been washed in hot water and put through a hot dryer cycle with tennis and dryer balls to soften up the hand) because it just made it so…. so…. ridiculous to wear, I guess. I really wanted a different lining – a softer, lighter lining; lighter than flannel-backed satin or kasha lining, typically used in winter coats.
The original Burda pattern is a tall pattern, and I didn’t bother to place the pockets accurately, so they sit about 10cm lower than they should on me. I want to move the pocket up to where they will be useful and easy to access with my not-tall arms.
The R front facing and front edge bugs me. It’s a grain thing, and I hate wearing it because of this. I intend to straighten it out and do it properly.
It’s just too long and dramatic to get worn much, and I have other fabric for other dramatic coats in my stash that I hope to make up soon.
The contrast band of linen velvet is nice in a dramatic coat, but I do actually want to wear this coat, and the current length makes it rather a process to get in and out of the car.
It’s too wide. I hate coats that fit small, and I was very enthusiastic in adding ease to my original iteration of this coat, so each side seam will be reduced by 4cm, for a total width reduction of 16cm.
I’ve re-cut the lining from a lightweight satin-backed crepe fabric from my local Fabricland that was actually marketed as drapery fabric (???). I laundered it to get that horrid polyester chemical smell out of it before cutting it out. I used the old lining as a pattern, after making forward-sloping shoulder alterations and taking in the sides by a total of 16cm.
So far I have completed the following alterations:
removed the lining
moved the pockets up 10cm
taken the side seams in 16cm
straightened the grain across the upper chest by doing a forward-sloping shoulder adjustment (Why didn’t I do this the first time around?!)
removed the lower velvet band
redid the facings, which, in combination with the shoulder adjustments, has made the fronts hang straight. Happy day!
All that is left is to put the lining back in after deciding on the length I want.
More importantly than my news about remaking my coat, I want to thank each and every one of you for all your comments and kind words on my last post. It may be cliché, but your wishes and encouragement meant so much, and on hard days, I go back and re-read them.
I, for one, am very glad the last decade is over and gone, particularly 2019, which has been the culmination of a difficult ten years.
This last year hasn’t had much sewing for a variey of reasons, and the sewing that I’ve done hasn’t gotten properly photographed, or wasn’t photographed at all. Some of it hasn’t even been worn… like a pair of jeans made from this fabric, for one.
It’s been a year of challenges and good things. I thoroughly enjoyed my French classes every Saturday – my heart was singing every time I drove home – but that came to a screeching halt in May due to health concerns.
I made a few tunic tops from linen and cotton voile that had been lingering for years in my stash.
I cannot remember when I purchased these fabrics, but I do remember where! And the tunics are thanks to Anne’s make for one of her daughters, which reminded me I had had a keen interest in the Burdastyle pattern every since it was released in February 2018. It felt good to just get on with the projects and get them sewn so I could wear them. Impulse sewing.
The summer went by quickly – too quickly – with so much stress at an unfullfilling job as we rolled out a new website, with little or no time to sew, and no mental energy left if there was time. We had a family wedding to attend in August, and I literally had nothing to wear that would fit my growing waistline, so sewed for 5 days straight, letting everyting else in the household go to pot, while I made this unsuccessful attempt to copy a spectacularly beautiful Dolce & Gabbana green velvet dress (which I cannot find anywhere except in print advertisements).
The dress seemed a lot worse to me on the day I wore it than it does now.
Of course I washed it afterwards (I always launder my own clothing, if I possibly can, instead of sending it to the toxic dry-cleaners), and the hem went wonky, mostly because I didn’t support it with flannel bias underlining. So it’s still hanging up, waiting for a do-over, or alterations, or disection and reincarnation. Then everything came crashing down in October, when I became an ostomate and was diagnosed with Stage III colorectal cancer. No wonder my waistline had been expanding so I had nothing to wear to the wedding! The sad part was, even as I was waiting for emergency surgery, all I could think about was, “Thank God I don’t have to go to work for the next few weeks.” It took me until the third week of recovery to realize the shocking absurdity of that being my first thought, given the situation.
These front bands make me so happy!
I have had so many ideas going through my head for sewing over the last three months, and no energy or mental strength to do any of it until this past weekend, partly due to recovery, partly due to rethinking so many parts of my life. I guess coming face to face with a potential death sentence sooner than you expect does that to one’s thinking. Re-evaluation and change are inevitable. Crossing the half-century mark in December brought several things into sharp focus, too, as a milestone will.
When I first began this blog a decade ago, it took a lot of courage to post pictures of my makes out there for the world to see, despite the fact that I’ve been wearing them since I was in my teens on a daily basis. It was so much fun for the first few years, but slowly negativity crept in from voices close to me, and the joy of making disappeared into the pointlessness of making garments that were not likely to be worn, given my lifestyle of a SAHM. That negative voice was given it’s proper perspective, although it is, unfortunately, not silenced, and still a part of what I hear now and then, through an excellent support service provided to my dear daughter #2, who has Down syndrome. It was her crisis that brought me the help I had desperately needed for years.
Two years ago I was introduced to the concept of choosing a defining word for each year. In 2017 it was ‘baby steps’ for me: baby steps forward into independence of thought and being; baby steps into health and freedom. Last year I struggled with a defining word, although ‘commitment’ was persistent, particularly because I really became aware of how making decisions is easy, but follow-through is difficult due to constant reassessment – sometimes hourly – on my part. ‘Courage’ became a rallying cry, too, early in the year, due to a friend’s struggle and hardship as she watches her husband disappear into the void of aggressive early onset Alzheimer’s.
And this year, I wasn’t going to bother thinking of a word, as I just want the next 6 months to have good reports and scans and results, and learning to look after myself (even at the expense of others’ demands) is still a daily decision and takes a lot of my strength and courage. But this quote really reverberated with me a few days ago, attributed to Muhammad Ali:
“He who is not courageous enough to take risks will accomplish nothing in life.”
Risk.
That is my word for 2020. Here’s to taking risks in sewing up my stash and sewing up patterns I’ve wanted to sew for years, regardless of their ever getting worn or used.
Back in the spring DD3 expressed frustration with the lack of choices in her wardrobe, specifically in the tops department. I must confess, after the last few unsuccessful projects that I made for her, I wasn’t very keen on risking more failures. They have seriously affected my sewjo. BTW, this post was originally drafted in May……
I sent her shopping for RTW a few weeks ago,and told her to try on e.v.e.r.y.t.h.i.n.g. she saw, even if it looked silly on the hangers, just to get her ideas flowing, and to take a lot of pictures so I could we what she liked. She came home with a $100 top from Wilfred, made of beautiful Japanese polyester, but the fit was off, and I didn’t care for the cost:product ratio. So she returned it, and went off to see what she could find that tickled her fancy in the Burda magazine collection housed in my sewing nook.
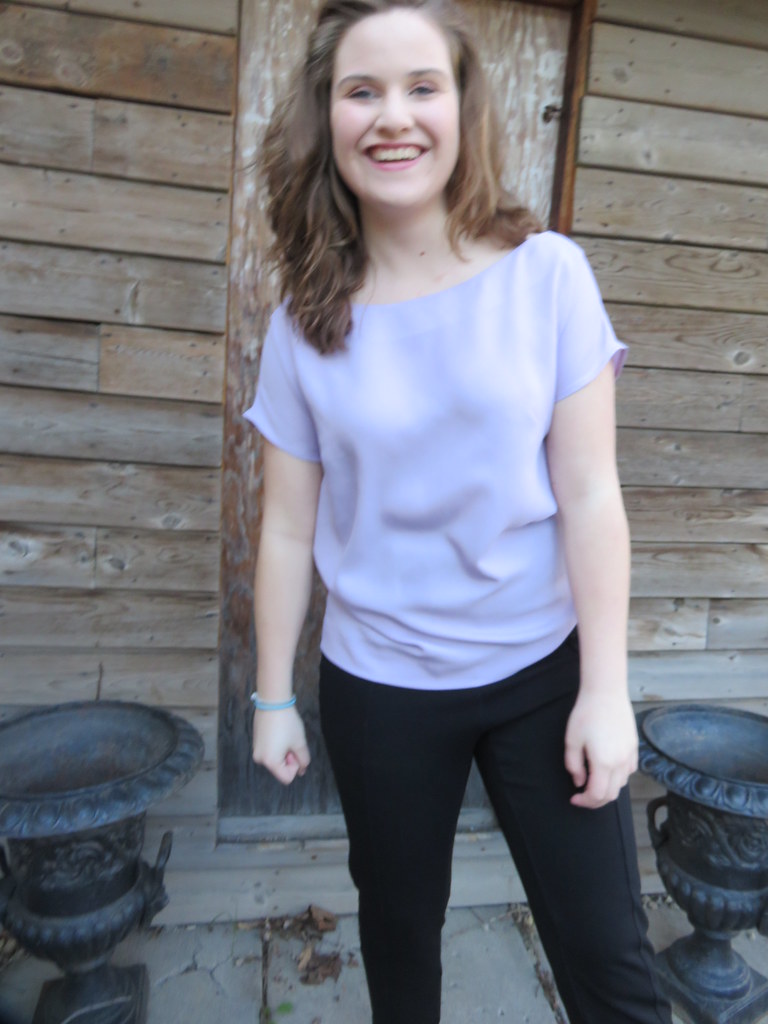
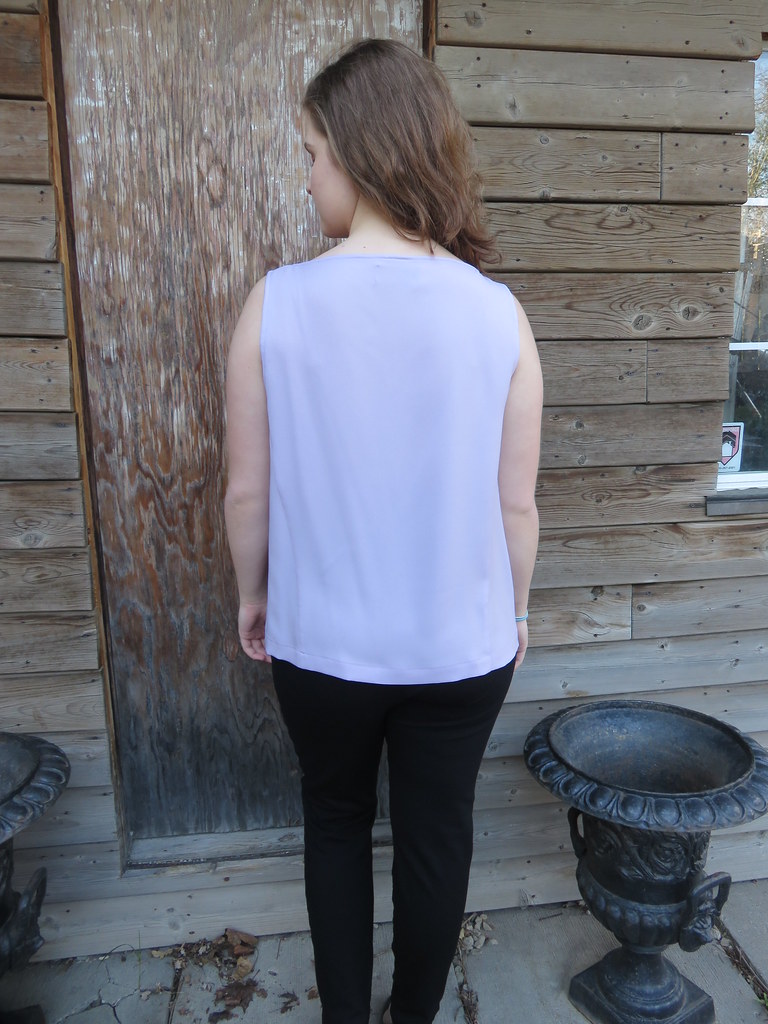
And I, browsing through my local Fabricland while purchasing thread for several new jeans projects for myself (I may not be trendy and stylish, but I love my me-made Jalie jeans and made three new pairs recently) stumbled upon a pretty lavender polyester satin crepe with a hammered finish. I purchased a 1.5m length, as it was the right shade of lavender i.e. not very pink, washed it, and set it on one of the sewing tables.
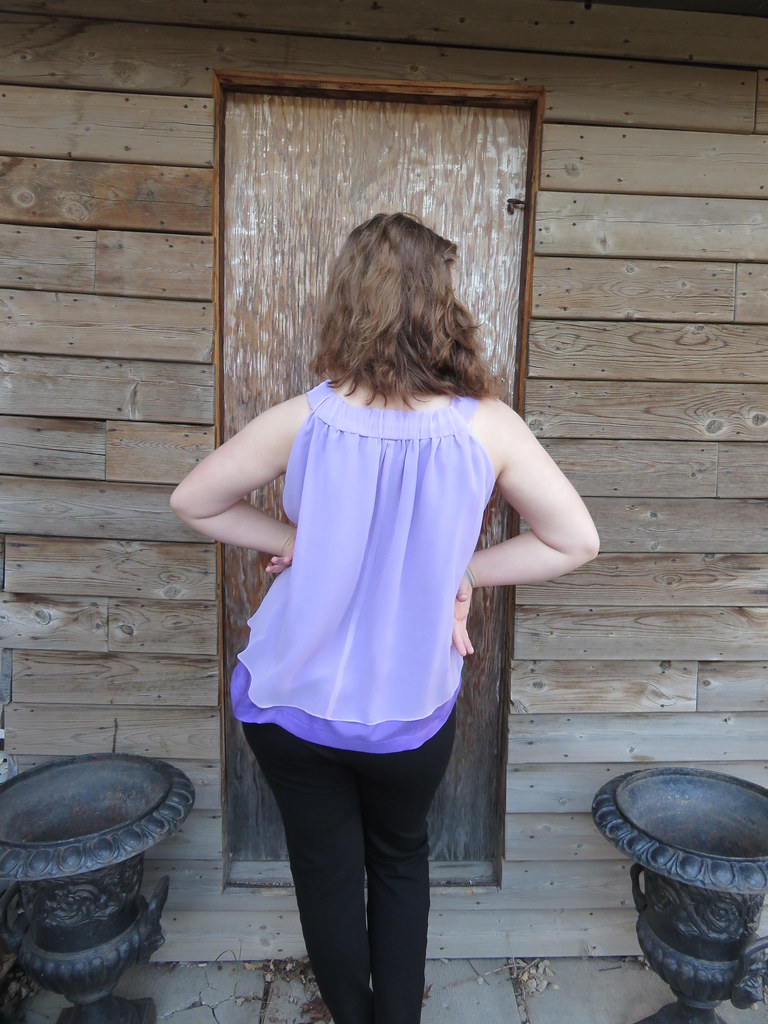
And she noticed it. And liked the colour. So I cut out two of the designs she had ear-marked, and suggested one that I had made for myself a while back, which she liked after she’d tried on mine.The first one is BurdaStyle 04/2016 #114, a very simple top with cut-on sleeves and a deep V neckline in the back. There is a band across the back shoulders which helps keep the wide neckline in place. There’s not much to say about this top. It’s very simple to make, the most difficult part being the adjustment of the back band to a length that sits properly. In retrospect, it would fit her better if I’d done a square shoulder adjustment for her swimmers shoulders.The second top is a repeat of Burda 04/2015 #103, which I’d made for me in 2017. I had her try it on and she liked the style. It’s another simple sew, although getting the centre front V to sit properly took some very careful cutting. I have plans for at least two of these tops for myself. The last of the lavender tops used up some stash silk: lavender chiffon and a darker habotai for the longer layer. It’s BurdaStyle 05/2014 #128, and DD3 wasn’t very sure of the design, but I loved the longer gathered back, and thought I’d take a risk while sewing up the stash fabric. I was prepared to thrift it if she didn’t like it in the end. This top is short: I added a full 10 cm to the length. Burda’s instructions are good and easy to follow, for once! I followed them to the ‘T’.
I hand rolled the hems.
And there we are: three new tops for her to wear. Funnily enough, the one she reaches for the most is gathered-back top. She’s going to wear it out first, mostly because the chiffon is rather fragile.
The lace is quite substantial and the tunic has some weight to it. The silk charmeuse lining is wondrously comfortable, and makes this such a pleasure to wear.
The centre back pleat was a bit of a pain to manipulate so that it lays flat but adding a small flower appliqué helped tack it all down into place. There is a facing which I interfaced with silk organza, under stitched, and then ‘topstitched’ invisibly 5mm away from the neckline in order to keep it in place. I also discreetly secured the edges of the facing through all layers so that it wold behave as one layer.
My solution for the side seams was to use a true Hong Kong finish, using the silk underlining, and then stitching an appliqué on the interior of the hem to hide the bottom 4 cm of seam allowance.
Another close up of the hem and side seam finishing.
I have come to terms with my desire for couture construction, having a garment to wear within a reasonable amount of time (since I cannot commit full days to totally do a garment with hand sewing) and finishing that I will be happy to on and wear.
Exhibit A: the sleeve seams. I undid the bias binding on the sleeve seams, trimmed the bias silk down to 2.5 cm in width, and bound each allowance edge separately.
And because I disliked the way the seam allowances are visible at the hem of the bell sleeves, I chose to appliqué one of the larger flower motifs on the inside of the sleeve to cover the bottom part of the seam.
In the photo, the bottom sleeve is inside out; the top left sleeve is right side out, but you can see the wrong side peaking out with no seam allowance showing – just another flower. Yay!
I am much happier with this, and am contentedly constructing the rest of the garment along the same idea. Hopefully I’ll have a finished garment to show you by the end of the week.